Photoshop Clipping Mask Easy Tutorial .
1. The first thing you’ll need to do to create the shape you wish to mask with. We created some vector text using the horizontal type tool.

3. After pasting you’ll have a new layer. Make sure that your image is ordered above the text (or shape) layer.

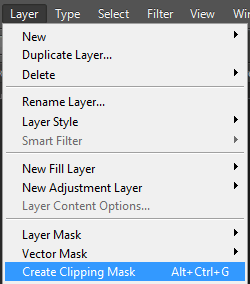
4. With the image layer selected, go to Layer > Create Clipping Mask. Alternatively, you can use ctrl+alt+g as a shortcut. If you plan on having a bunch of images to shape, the shortcut will save you a ton of time. Make sure to use it!


Labels: Clipping Path, Clipping Path Service, Image Masking, Masking Image, Photoshop Tutorial, Photoshop Action, Photoshop Background Remove, Photoshop Background Remove., Photoshop Image Masking, Remove Background


0 Comments:
Post a Comment
Subscribe to Post Comments [Atom]
<< Home